좋은 내용의 글들이 계속 올려질 수 있도록 "공감" 버튼을 꾹 눌러주세요.
ㅁ 개요
O 프로그램 소개
- 이번 글은 이전글( 2023.12.24 - [분류 전체보기] - Gemini AI & Vertext AI API 사용 하기 - 0.소개편 )에 이은 2번째 글로 구글의 제미나이 AI 및 Vertext AI API를 사용하기 위한 사전 환경설정 방법에 대해 알아보겠습니다.
O 참고사이트
https://console.cloud.google.com/vertex-ai/generative/multimodal/gallery?project=projectid
자산의 project id를 위의 URL 주소의 빨간색 부분에 넣어 주시면 됩니다.
O 주요 내용
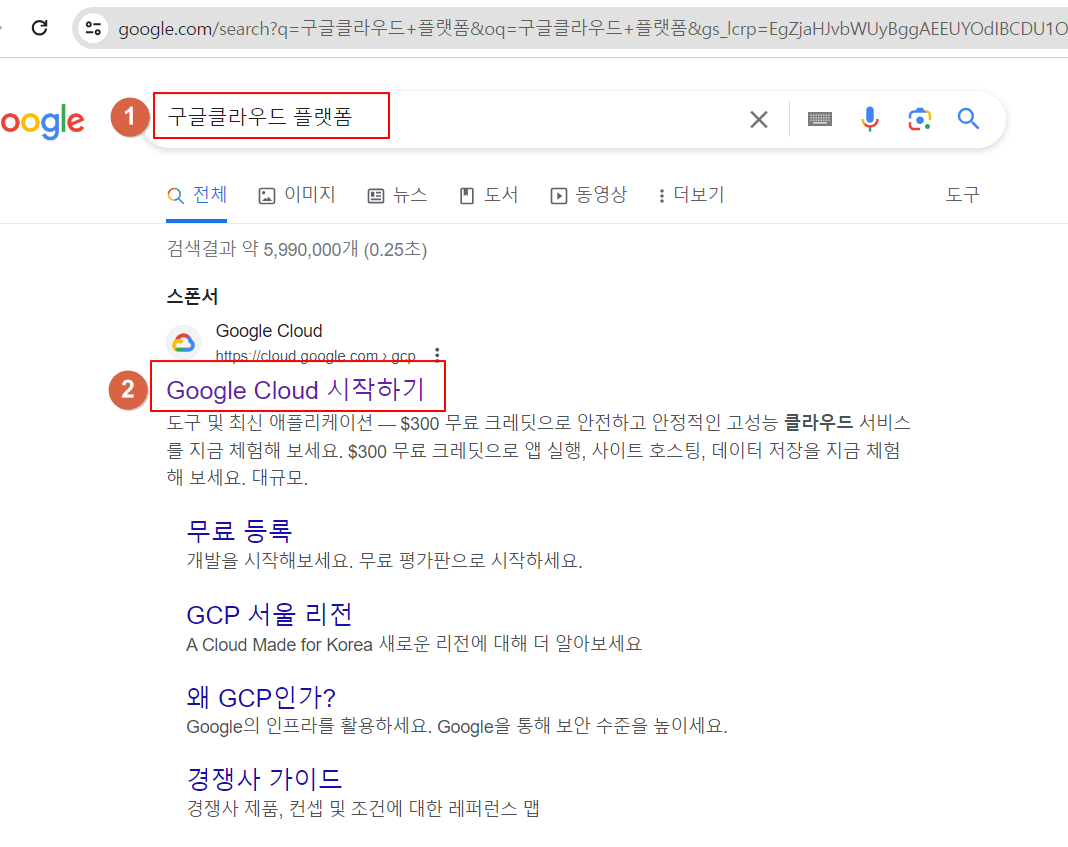
1. 구글계정으로 로그인한 상태에서 아래와 같이 브라우저에서 '구글클라우드 플랫폼'로 검색 후 'Google Cloud 시작하기'을 클릭합니다.
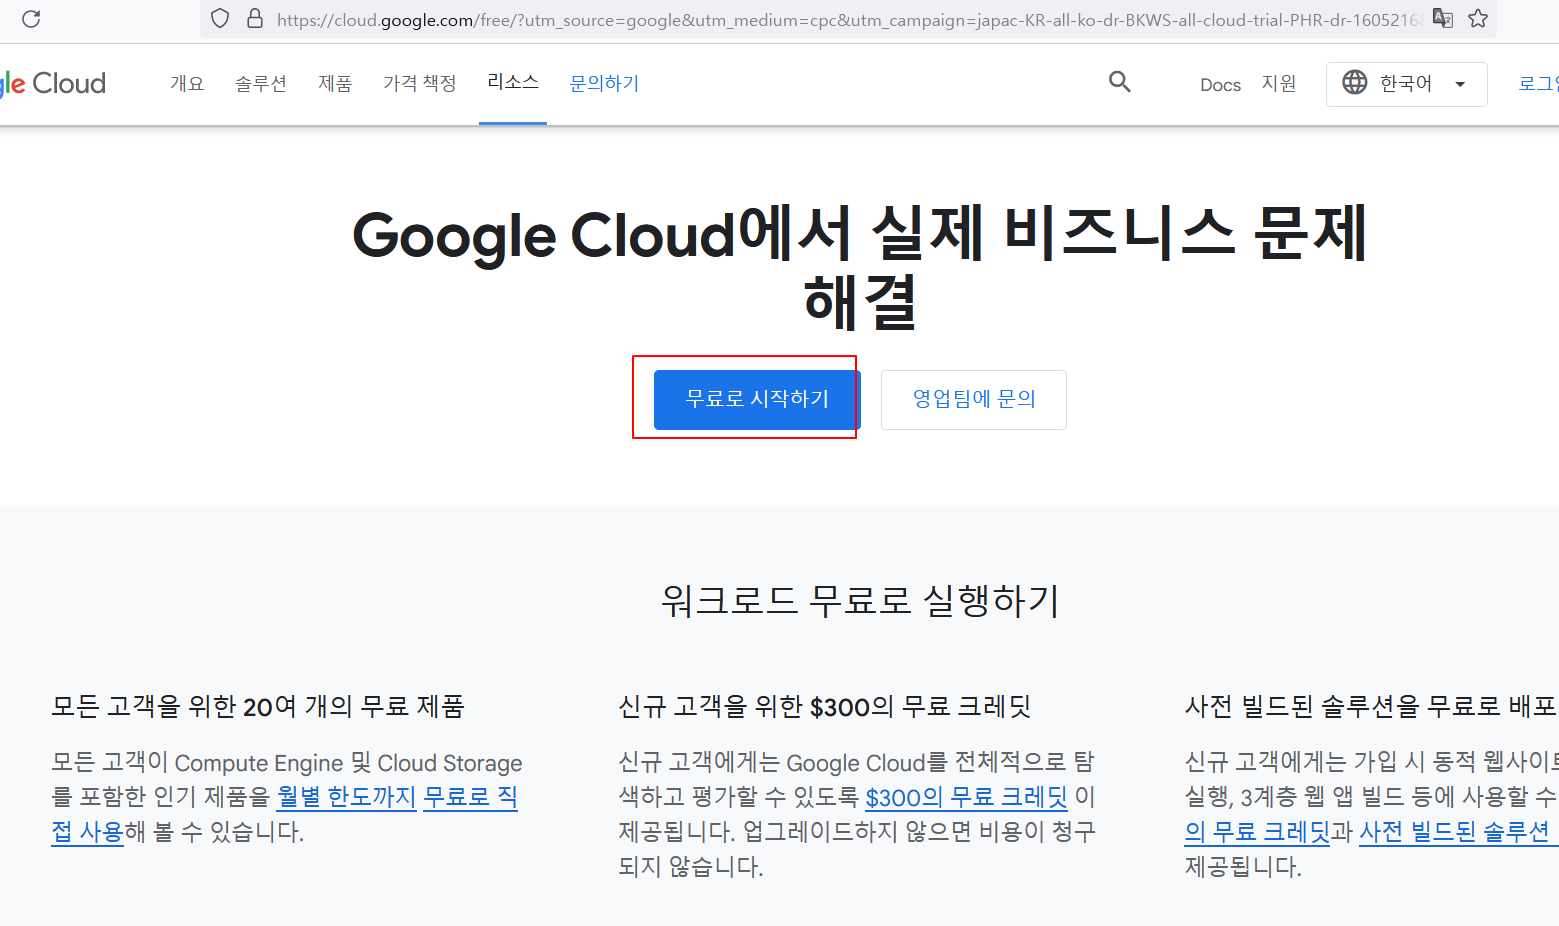
2. "무료로 시작하기"를 클릭합니다.
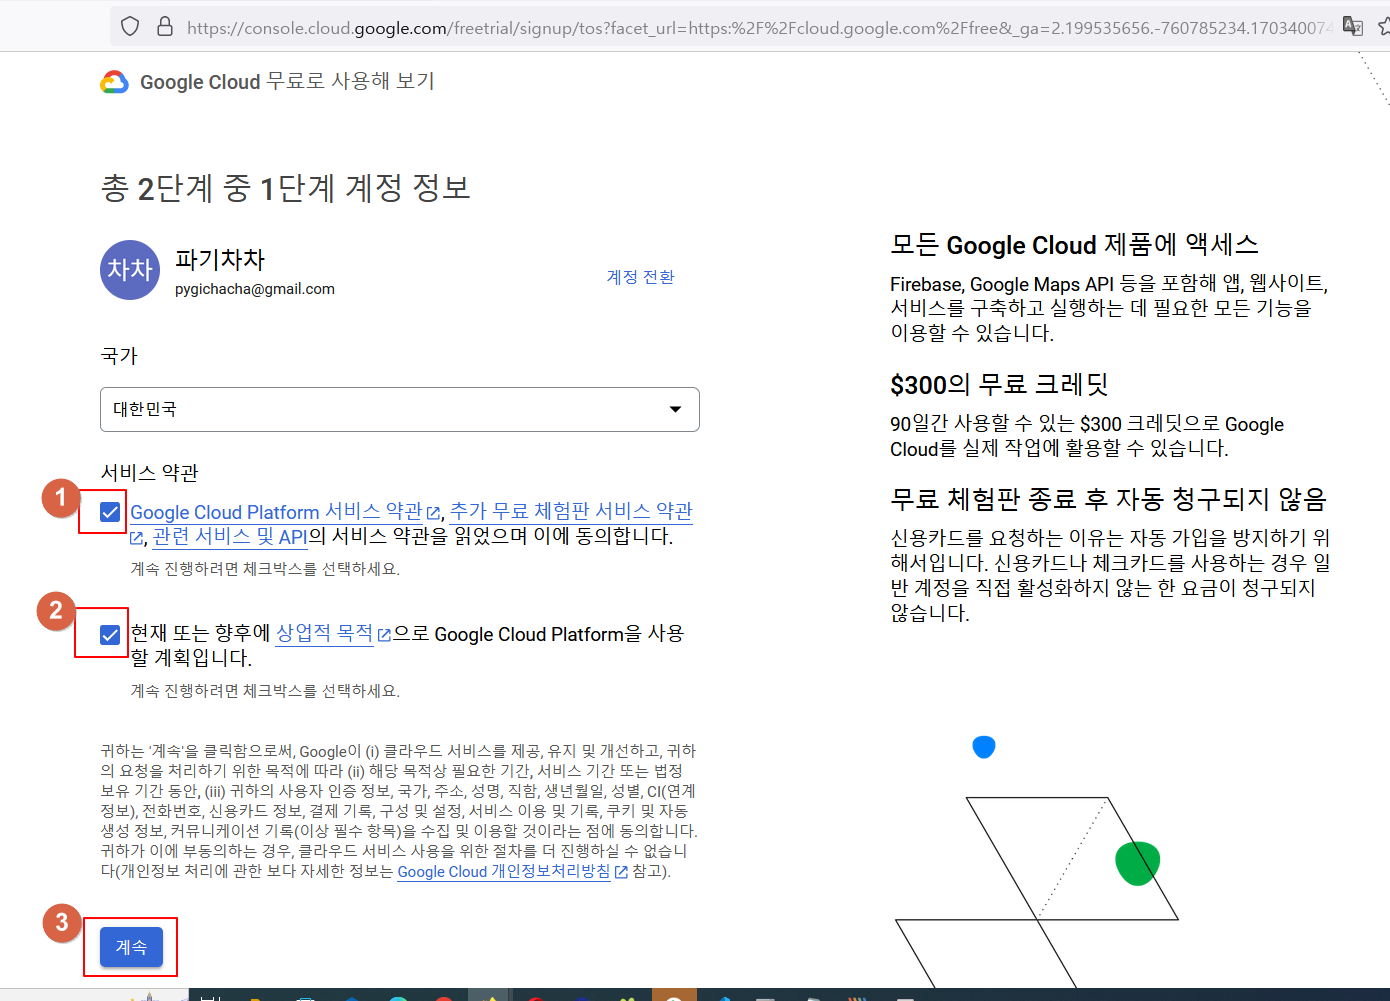
3.아래오 같이 체크 후 "계속"을 클릭
4. 구글 클라우드 플랫폼을 사용하기 위해서는 결제 등록이 필요합니다. 실제 결제는 되지 않으며, 유료 기능을 90일간 사용할 수 있습니다.
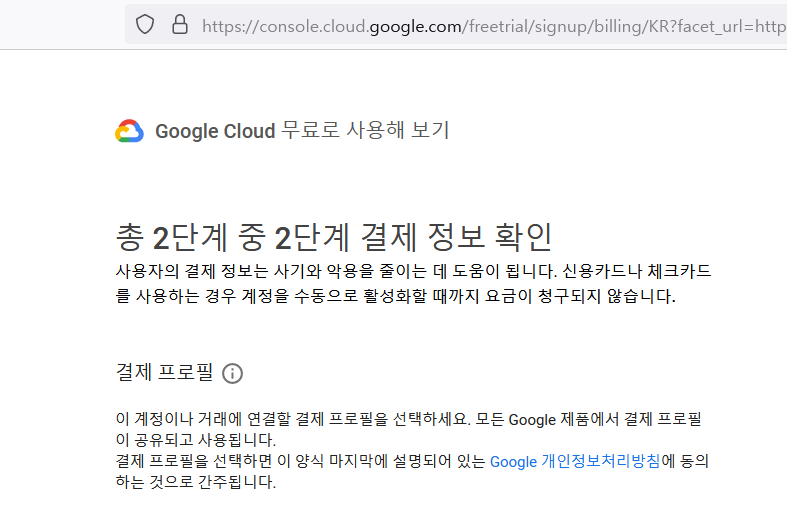
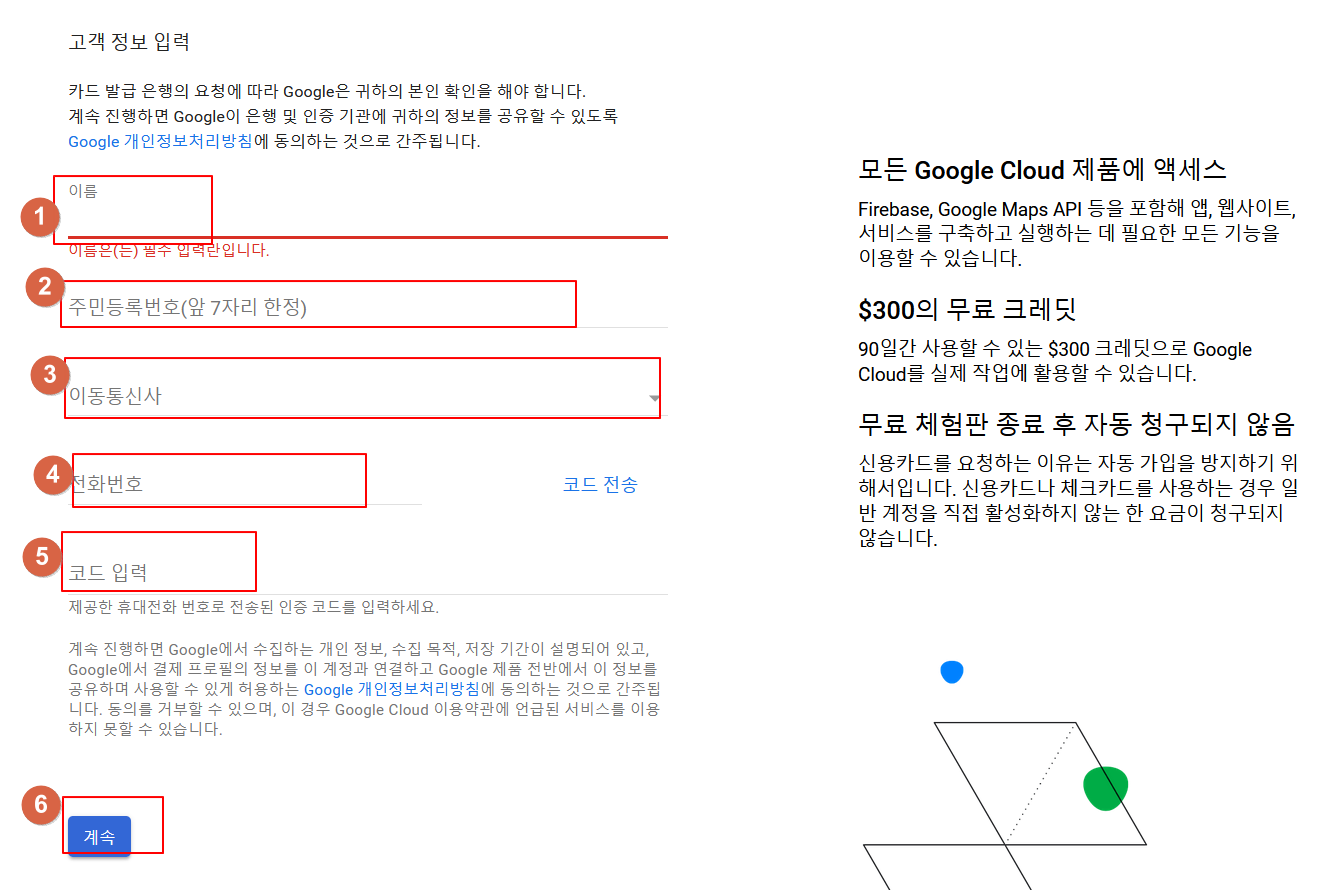
5. 아래와 같이 결제를 위해 자신의 정보를 입력 후 "계속"을 크릭합니다.
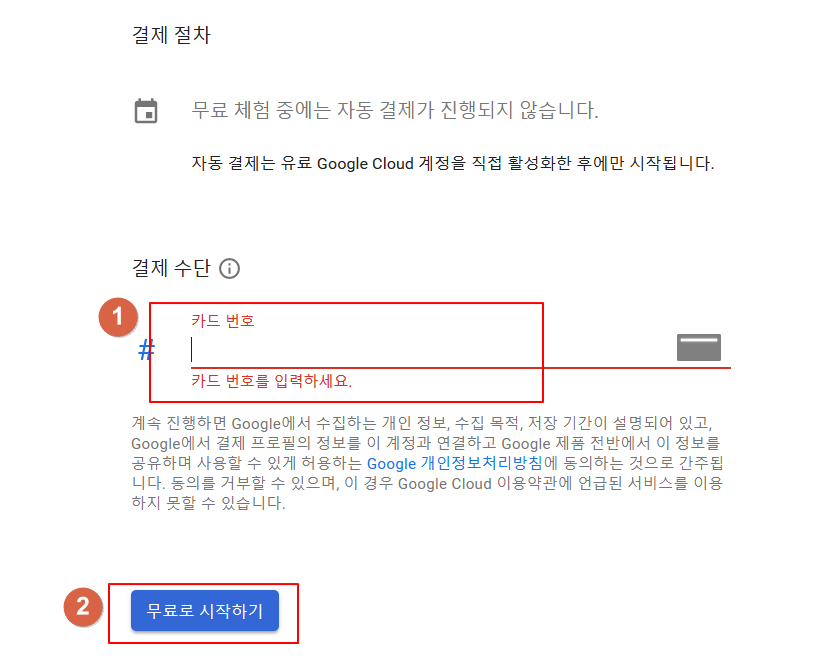
6. 계속해서 아래와 같이 카드번호를 입력 후 "무료로 시작하기"를 클릭합니다.
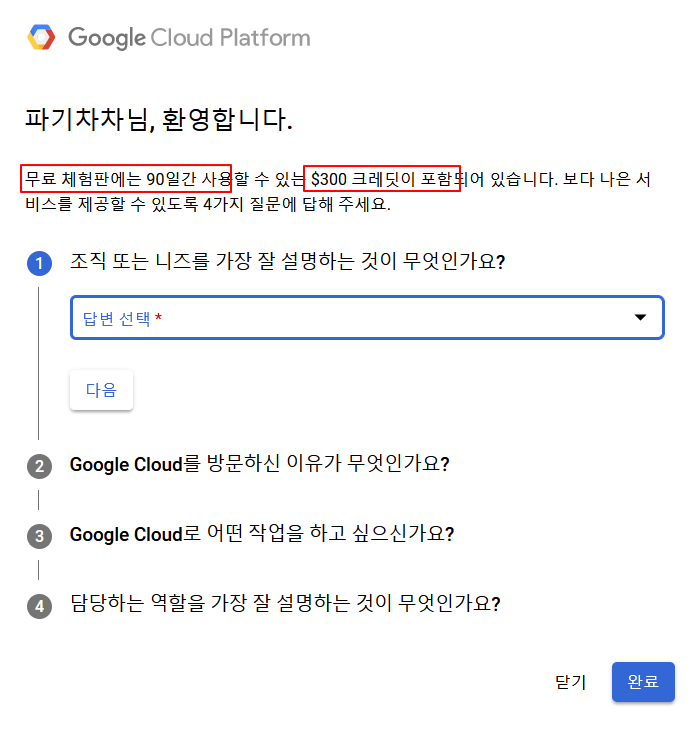
7. 무료체험판의 경우 90일간 300달러까지 사용 가능합니다. 아래 적절하게 답변 후 "완료"를 클릭합니다.
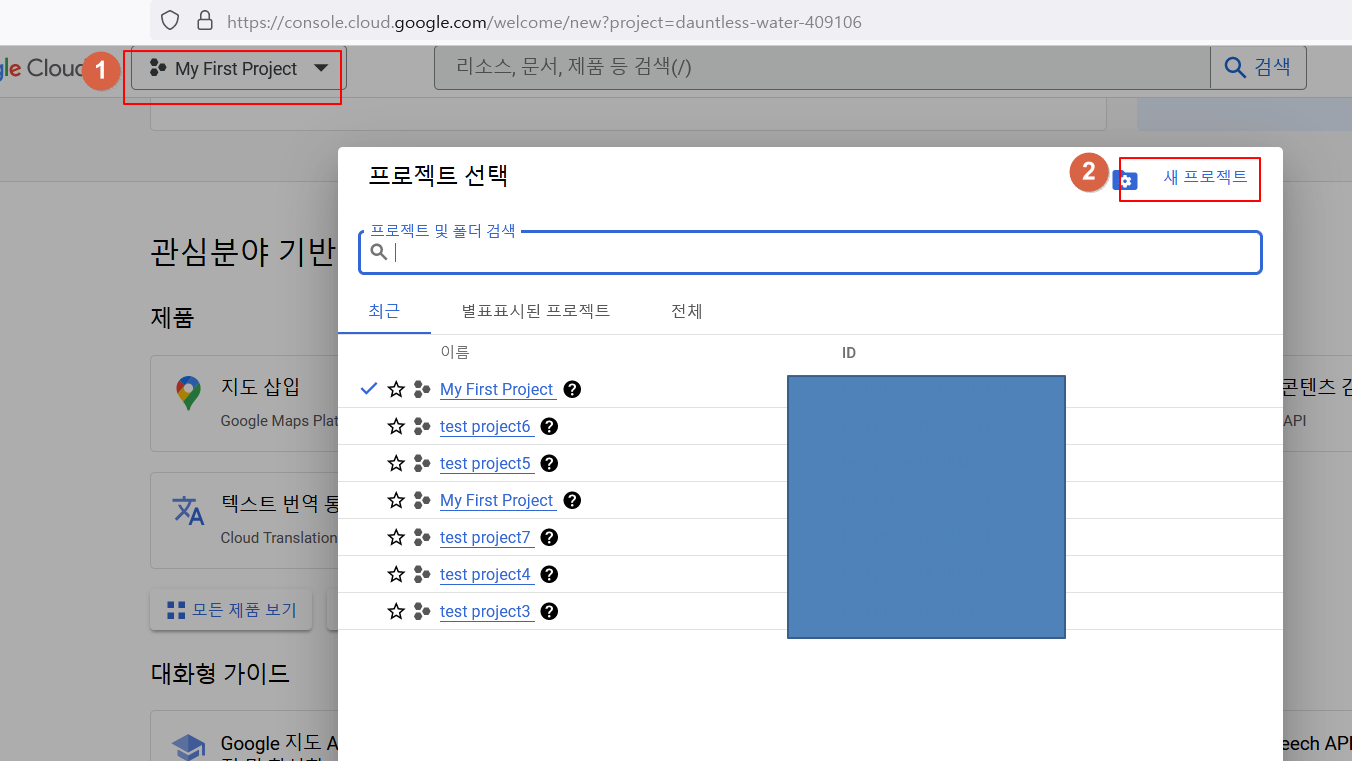
8.이제 GCP(구글 클라우드 플랫폼)의 새로운 프로젝트를 만들고 이 프로젝트 id를 사용할 것입니다.
아래와 같이 "새 프로젝트"를 클릭합니다.
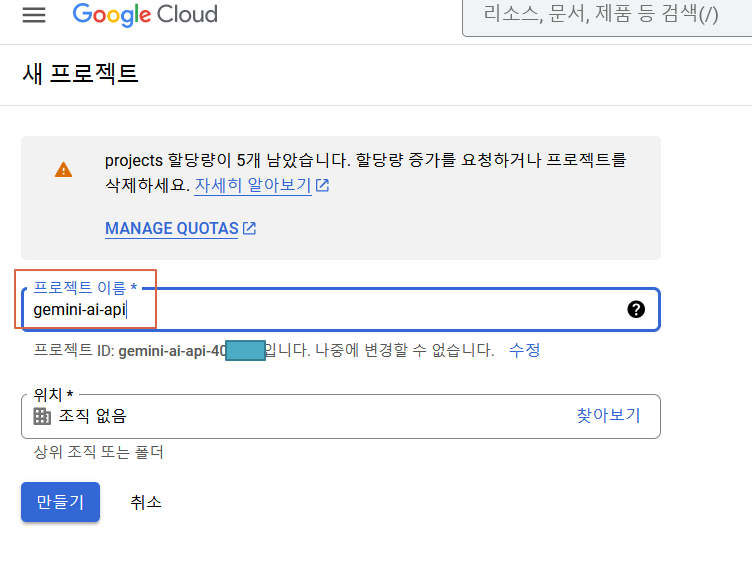
9.적당한 프로젝트 이름을 넣고, "만들기"를 클릭합니다.
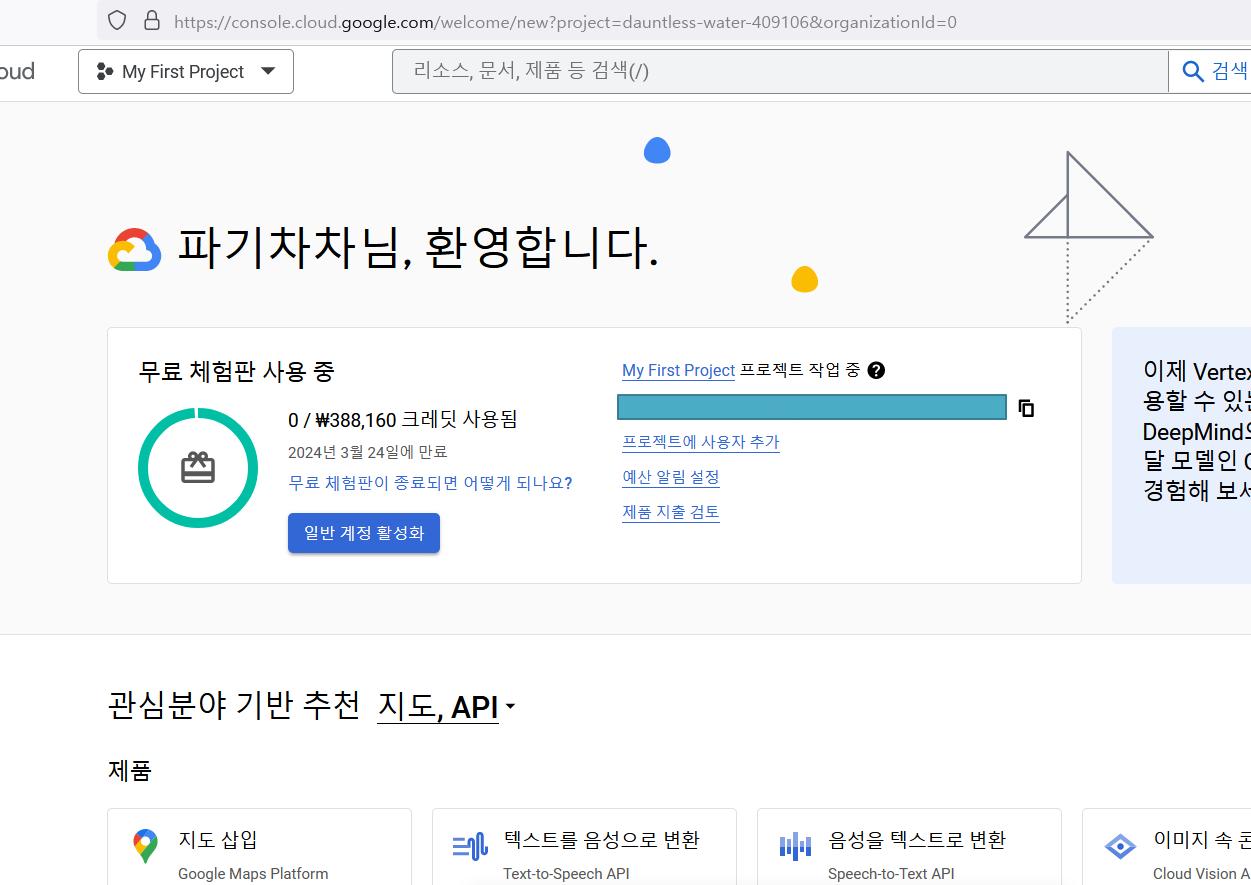
10. 새로운 프로젝트가 만들어 졌습니다. 아래에서 "일반 계정 활성화"를 누르면 GCP의 새로운 기능을 300달러까지 사용해 볼 수 있으나, 300달러를 초과하면 사용한 만큼 과금되므로 일단 저는 "일반 계정 활성화" 버튼을 클릭하지 않았습니다.
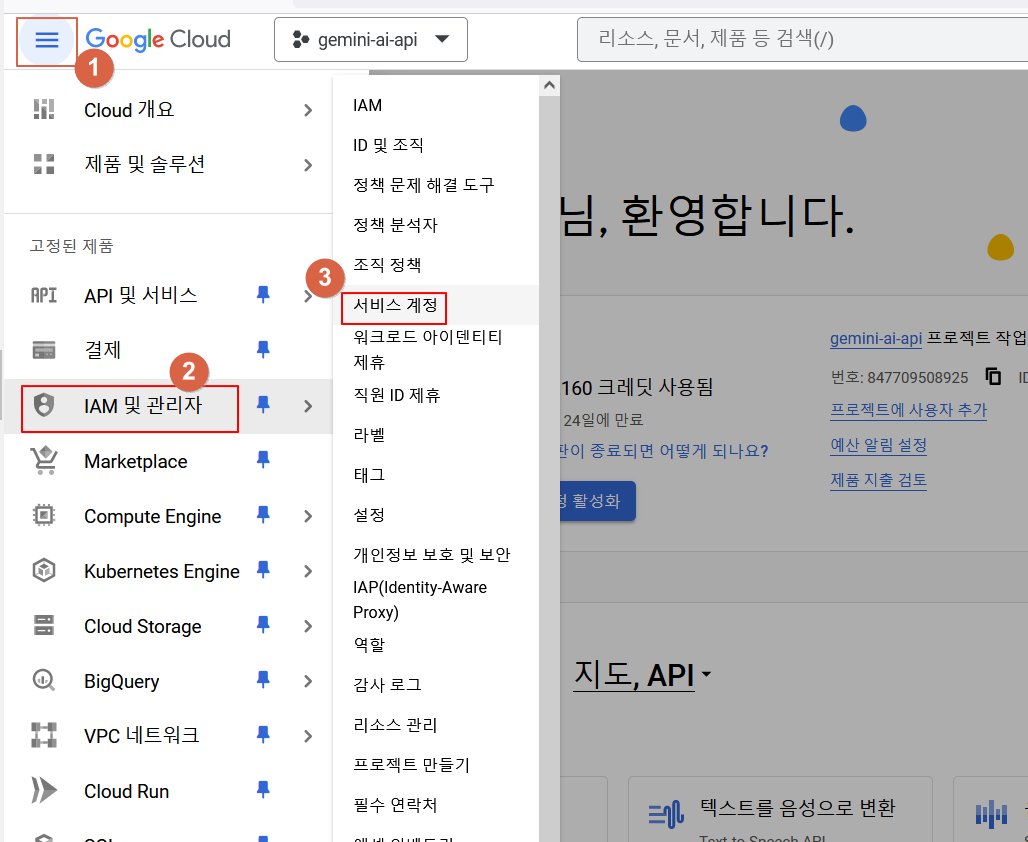
11.이제 제미나이 API를 사용할 수 있도록 '서비스 계정'을 만들고 이 서비스 계정의 키를 생성해주어야 합니다.
아래와 같이 "서비스 계정"을 클릭합니다.
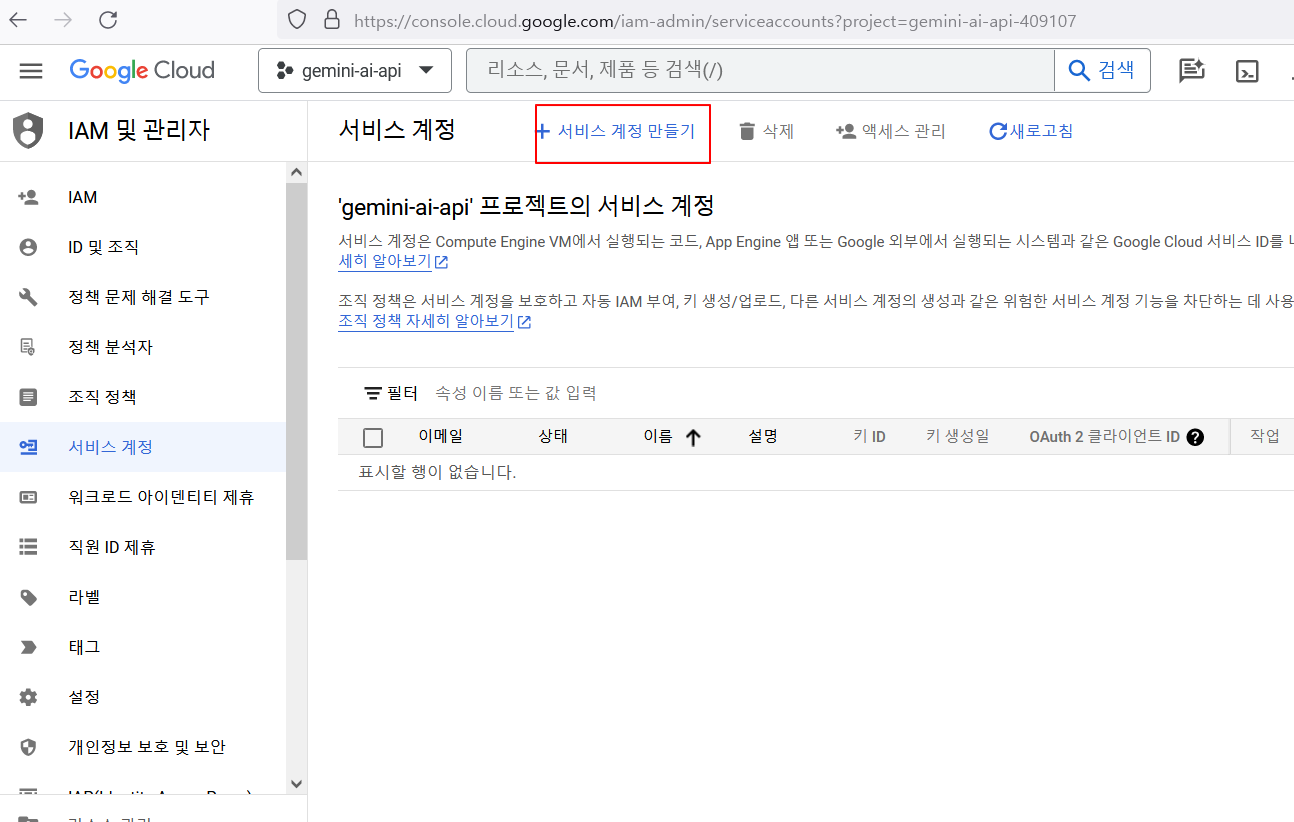
12. 아래와 같이 "서비스 계정 만들기"를 클릭 합니다.
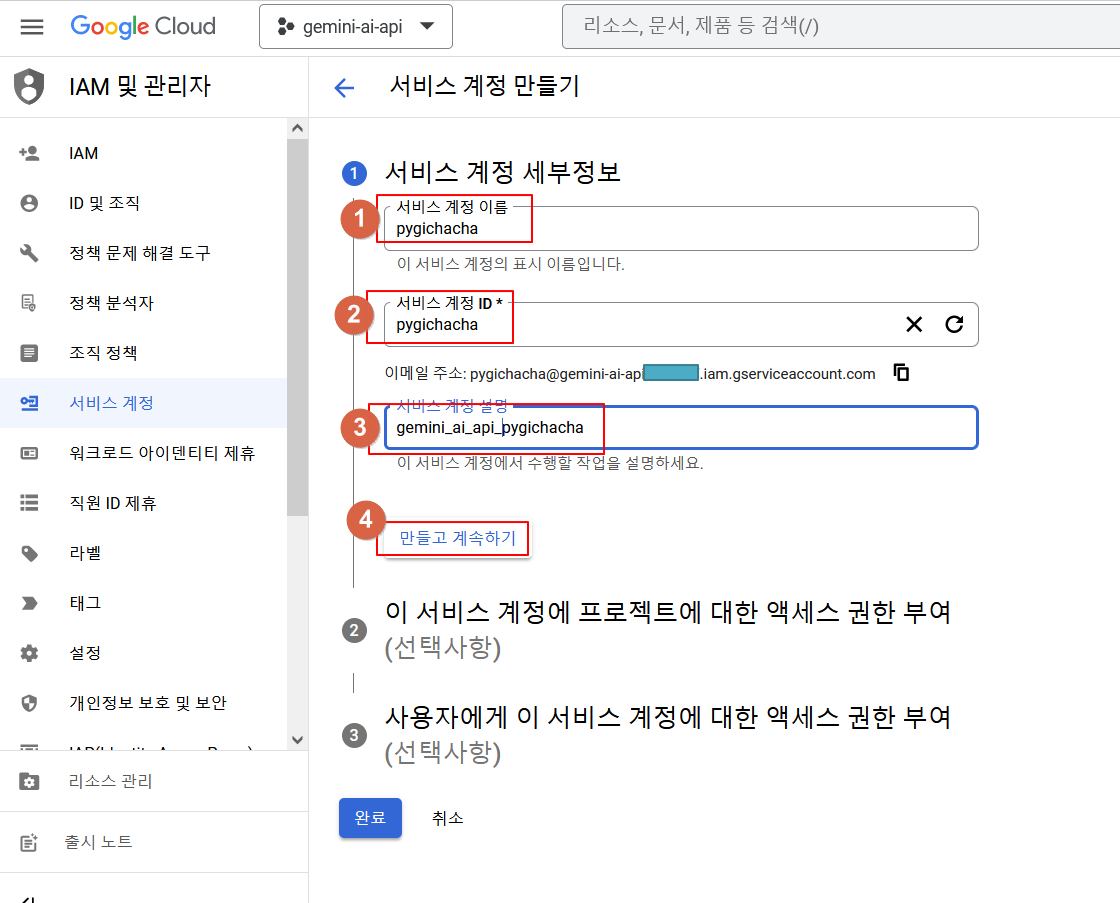
13. 서비스 계정의 세부정보를 입력 후 "만들고 계속하기"를 클릭합니다.
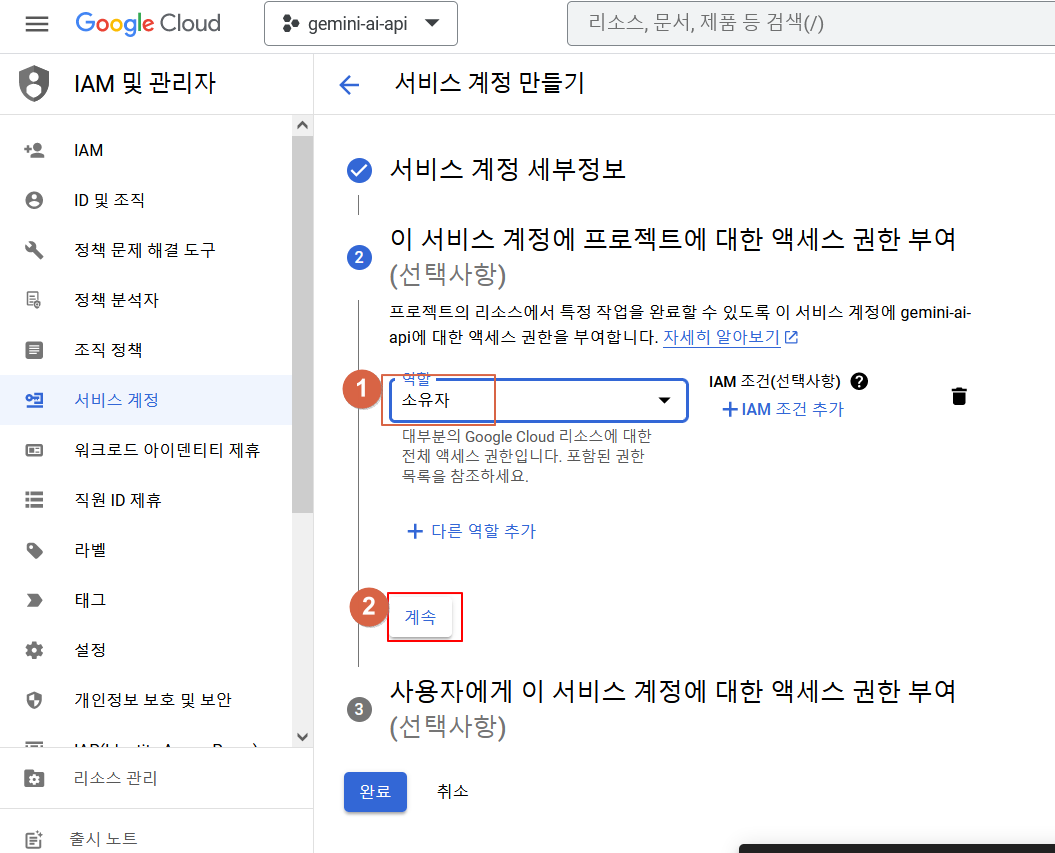
14. 아래와 같이 역할에 '소유자'를 선택 후 '계속'을 클릭합니다.
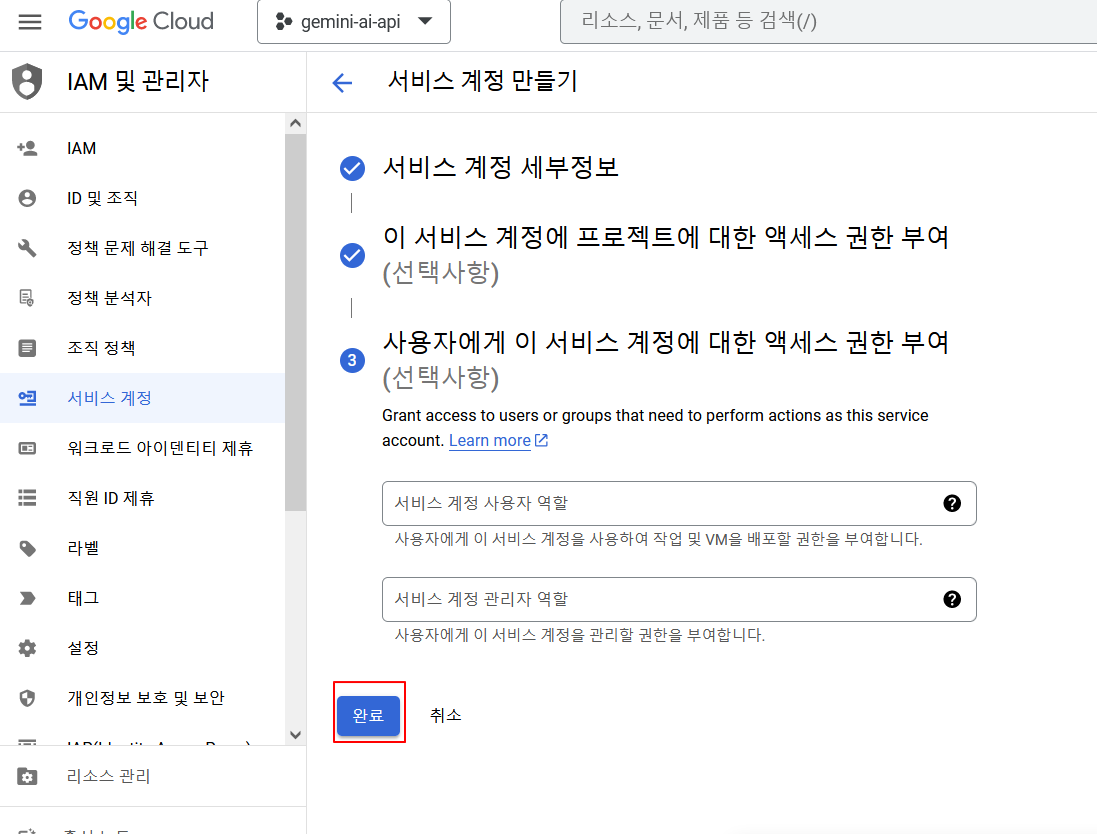
15. "완료"를 클릭하여 프로젝트의 서비스 계정을 만듭니다.
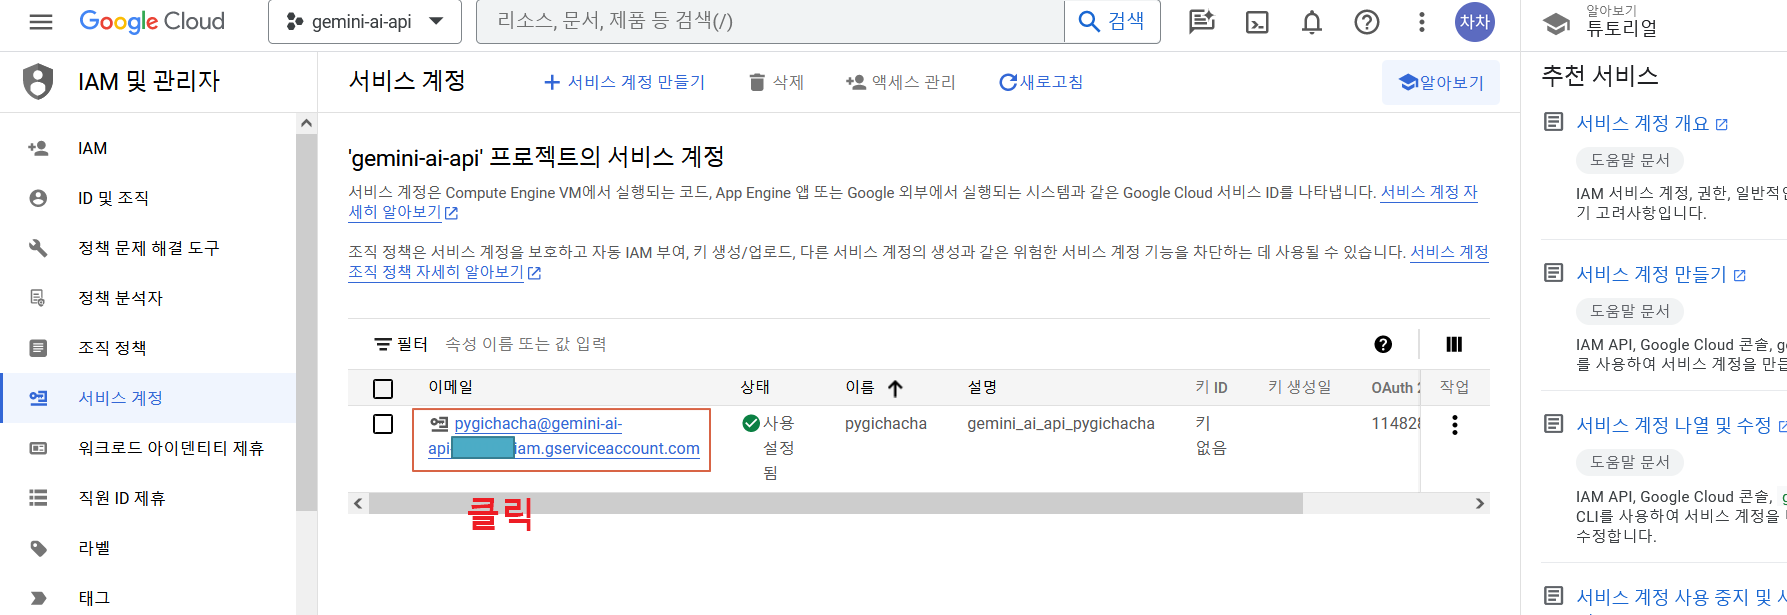
16. 만들어진 서비스 계정을 클릭합니다.
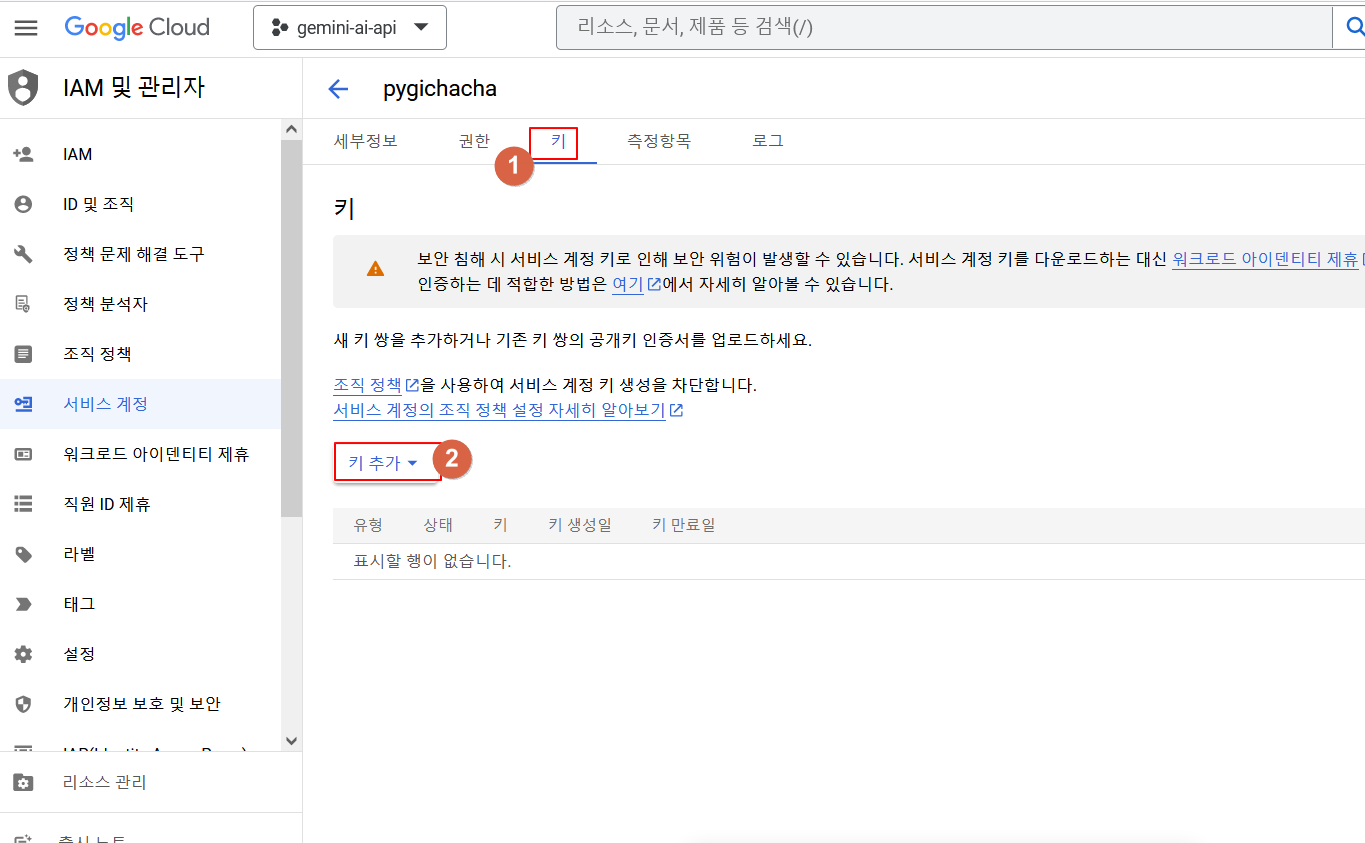
17. 여기서 '키' 탭을 선택 후 "키 추가"를 클릭합니다.
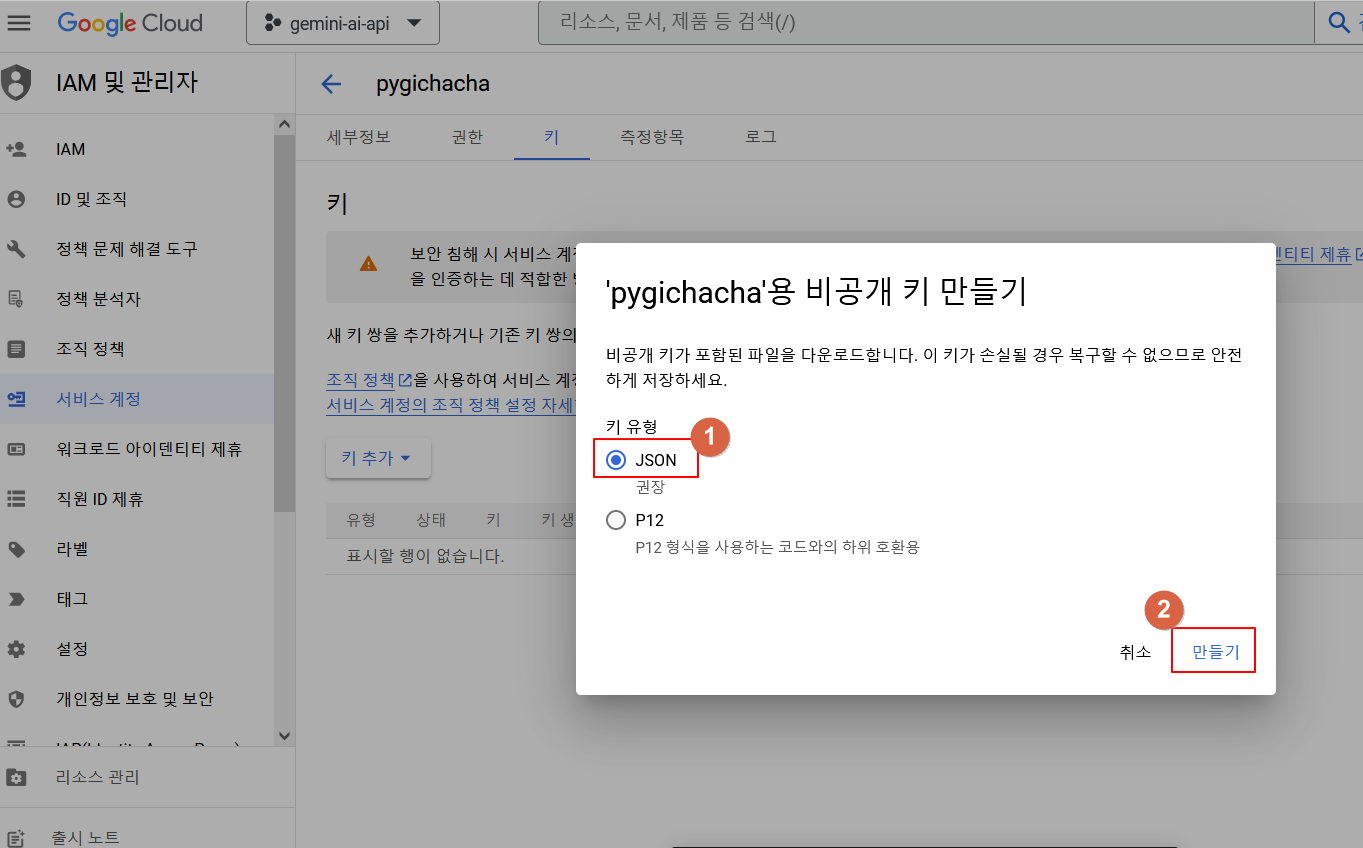
18. "JSON"을 선택 후 "만들기"를 클릭합니다.
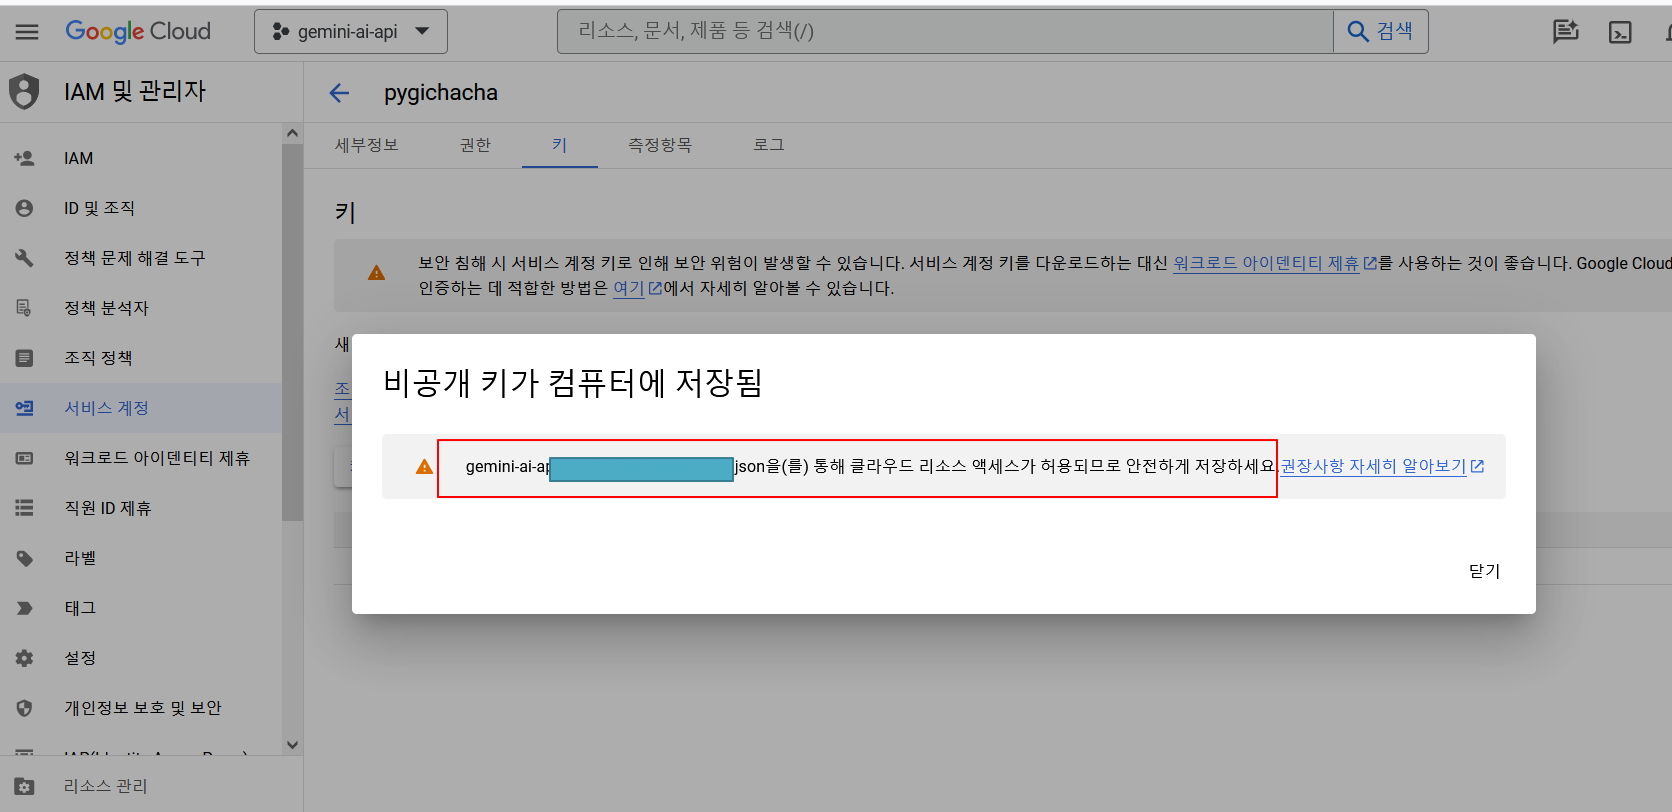
19. 아래와 같이 키가 만들어 지고, 내 컴퓨터에 다운로드 됩니다.
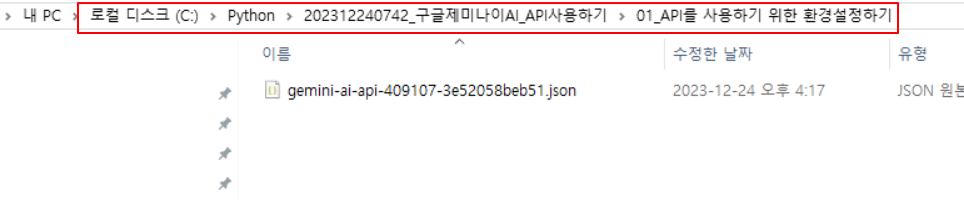
20. 다운로드 폴더에 위에서 만들 키(*.json)파일이 정상적으로 다운로드 되었습니다.

21. 이 키파일을 적당한 곳으로 옮깁니다.(저는 개발 프로젝트 영역에 옮김)
그리고 위의 주소를 복사해 둡니다.
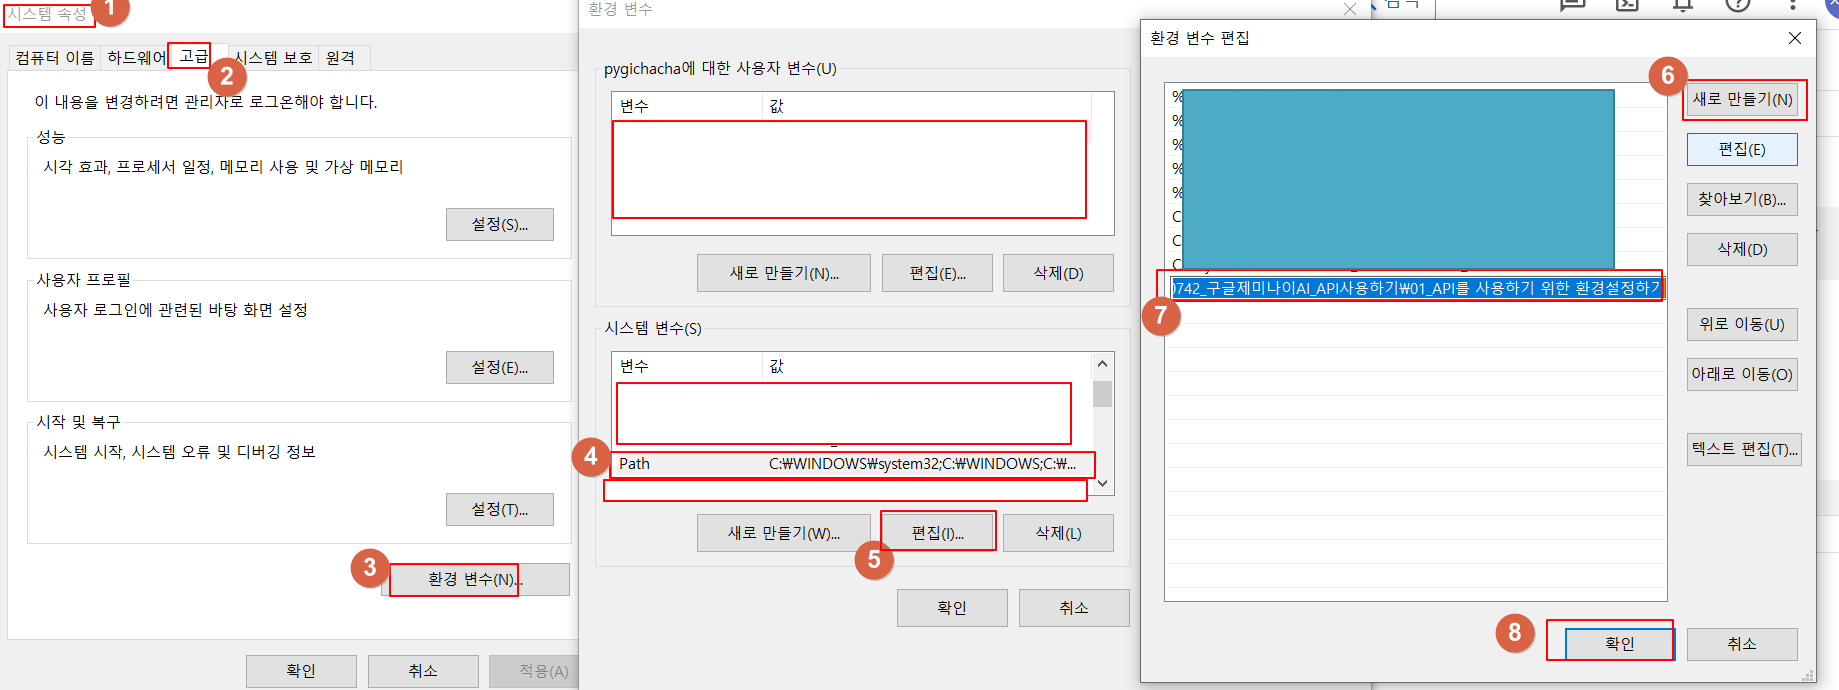
22. 이 키파일은 인증/권한 체크를 위해 계속사용해야 하므로 시스템환경설정의 path에 넣어 둡니다.
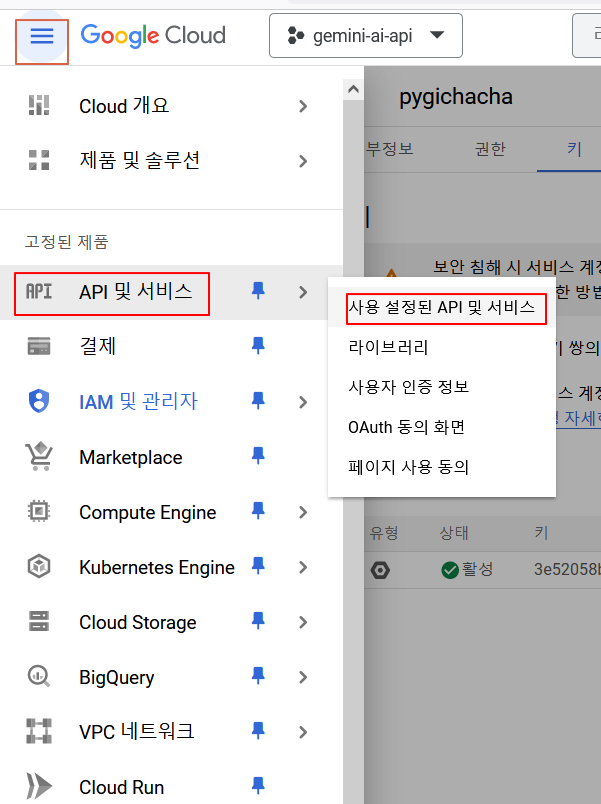
23. 다음으로 구글의 제미나이 ai api를 사용하려면 vertex ai api 서비스를 "사용" 설정해줘야 합니다.
아래와 같이 "API 및 서비스" > "사용 설정된 API 및 서비스"를 클릭 합니다.
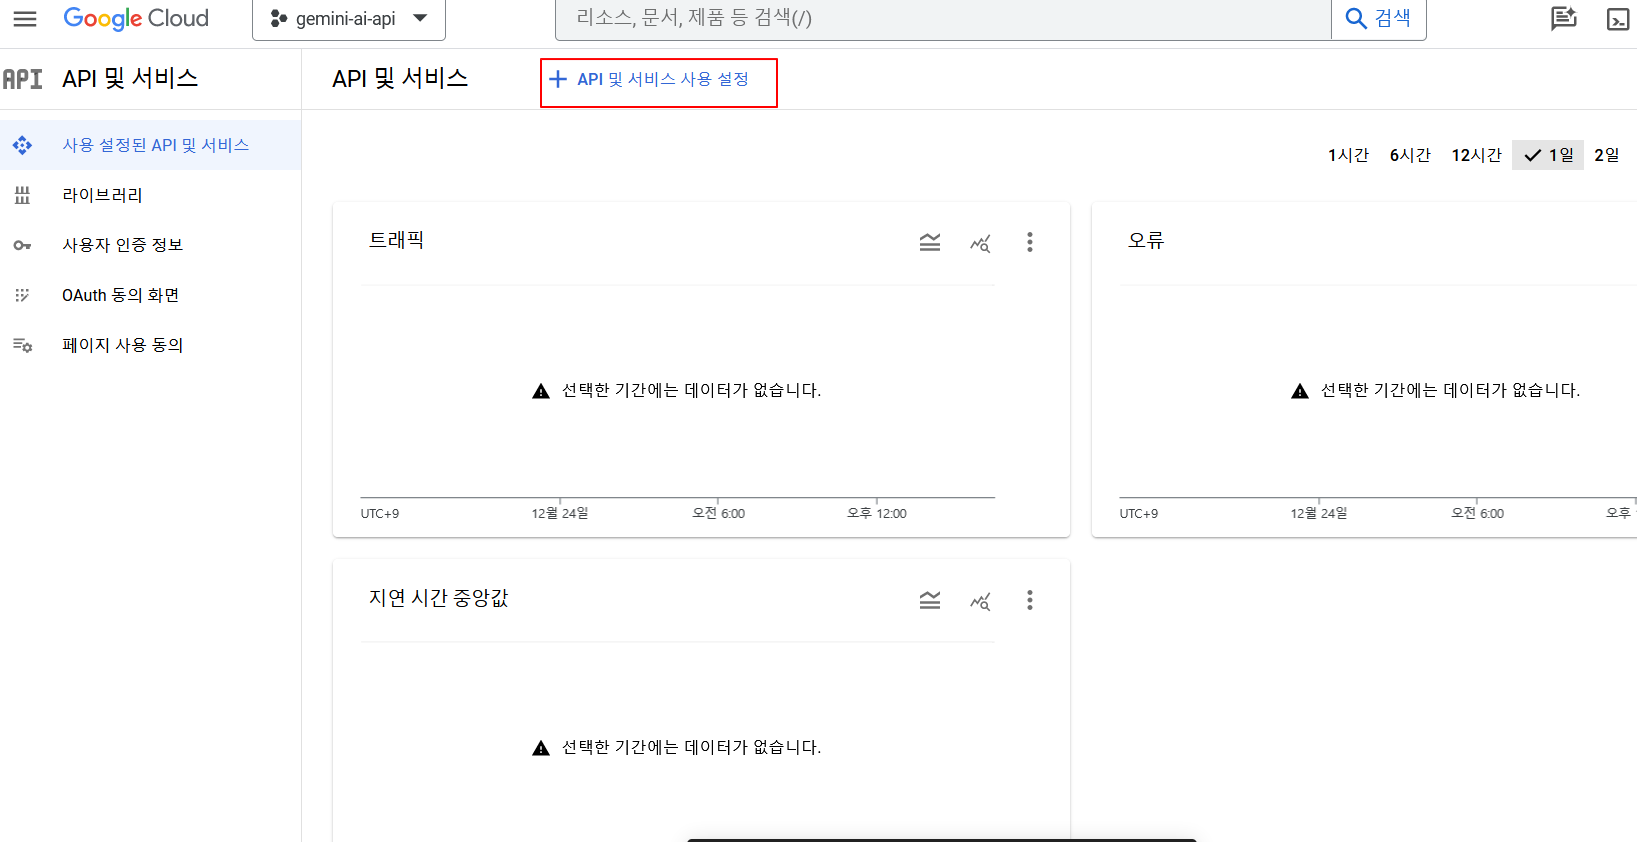
24. "API 및 서비스 사용 설정"을 클릭 합니다.
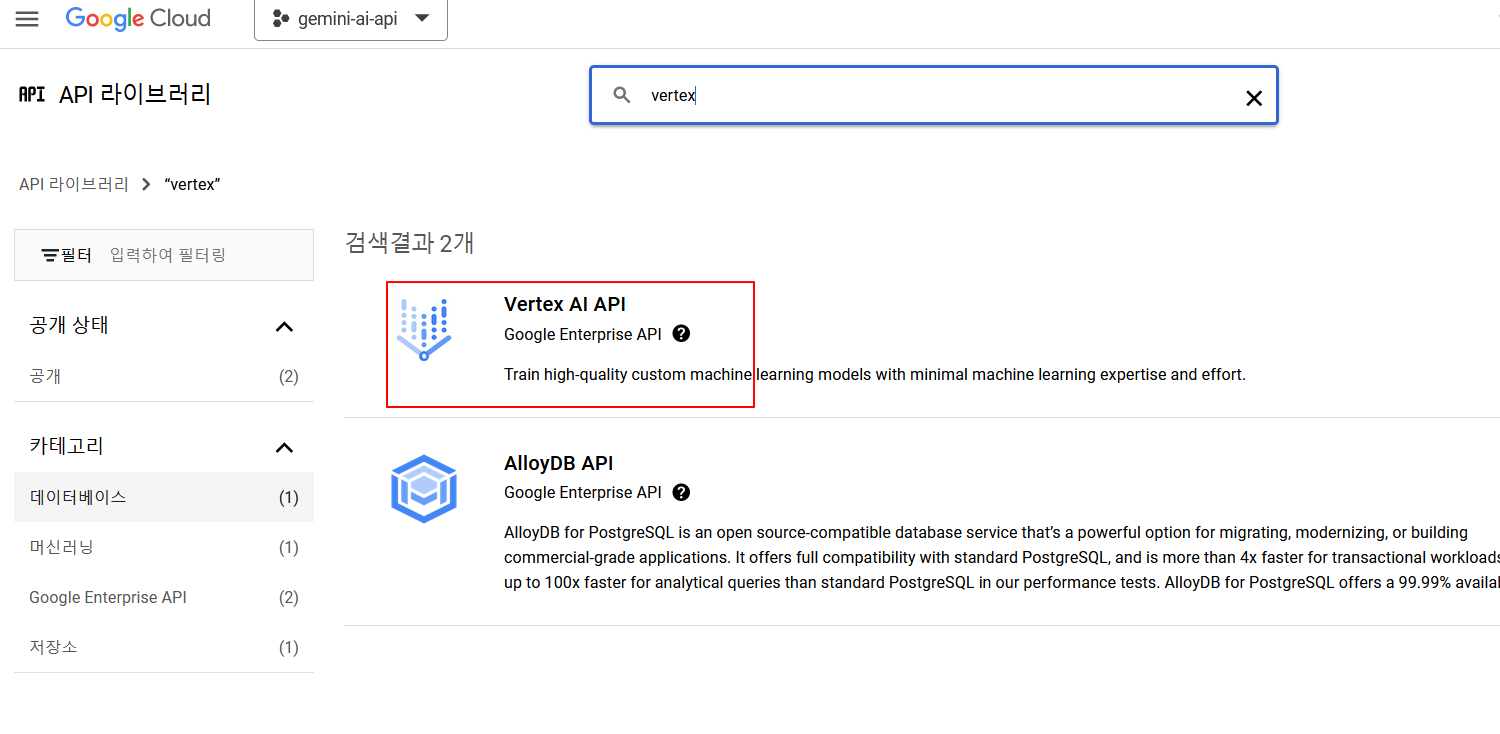
25. 검색 창에 "vertex"로 검색합니다.
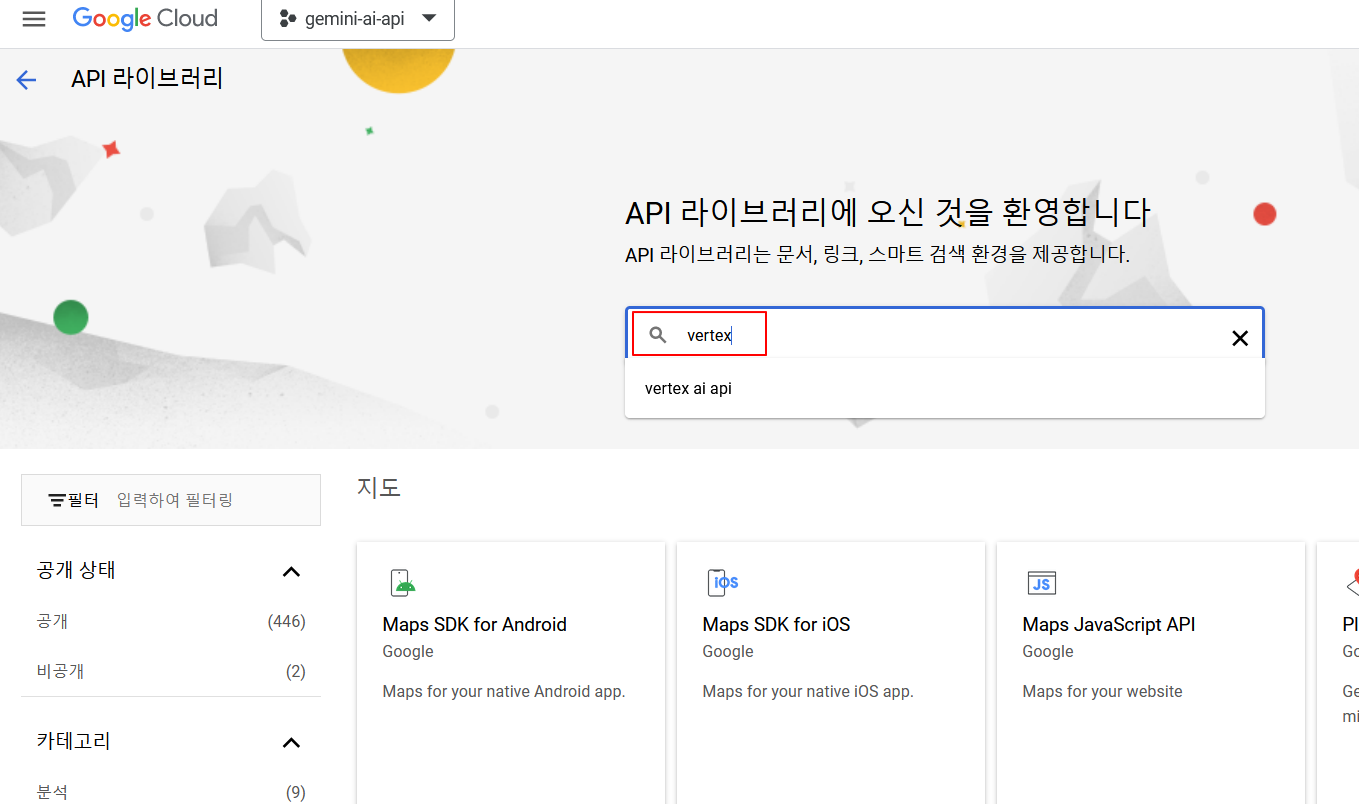
26. 아래에서 "Vertex AI API"를 클릭합니다.
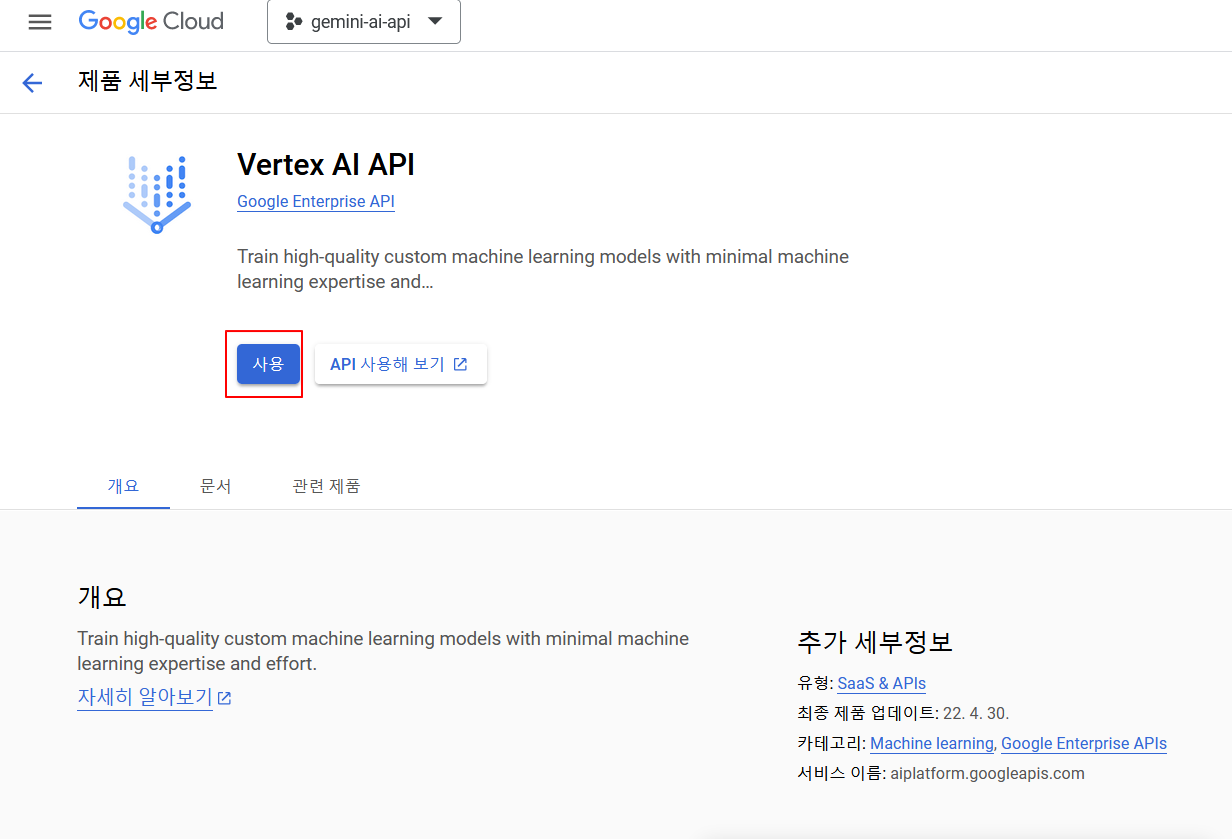
27. 아래에서 "사용"을 클릭합니다.
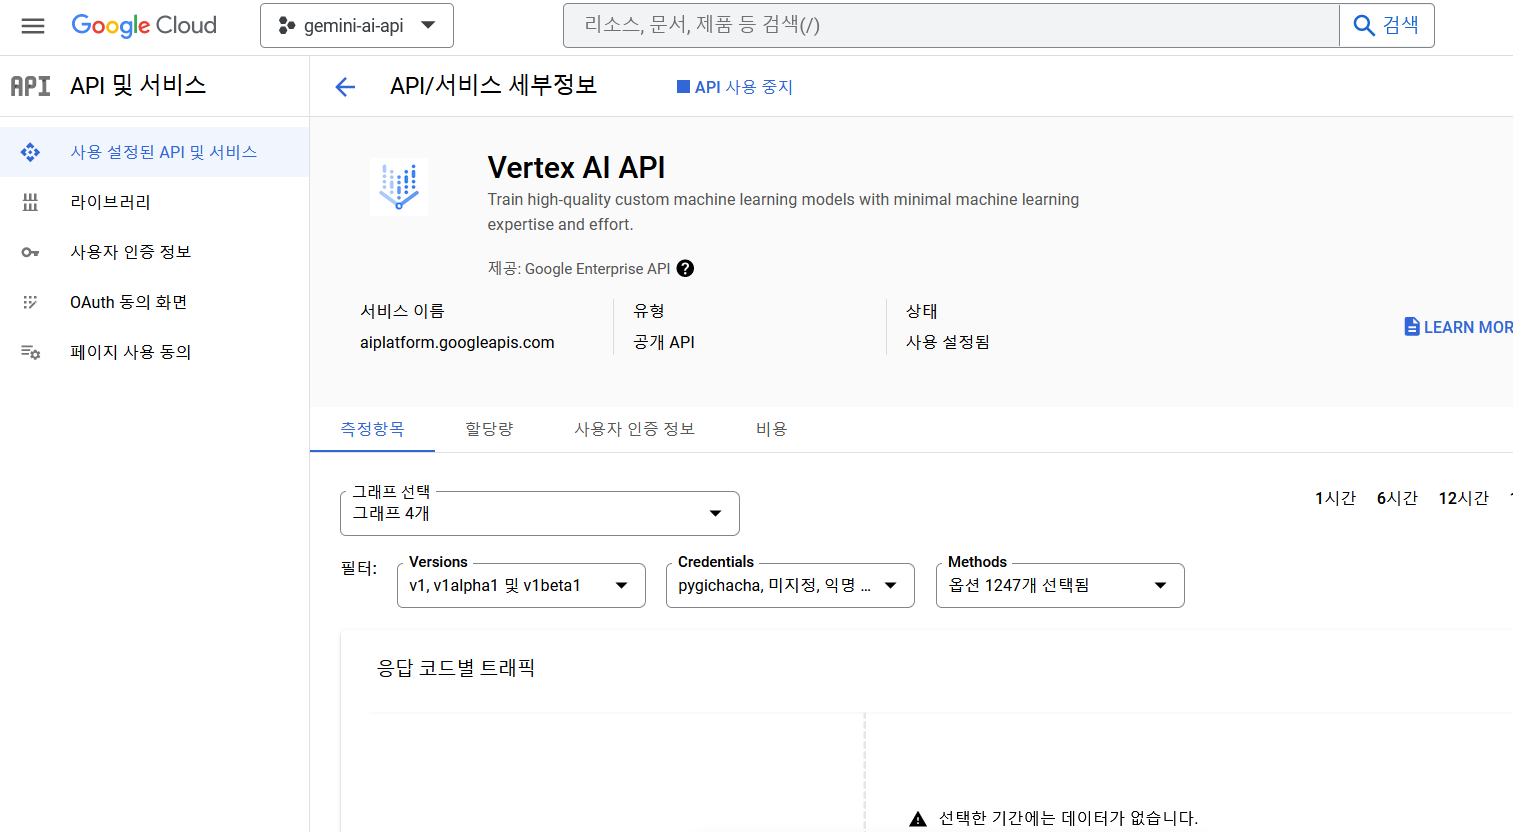
28.이제 구글 제미나이 AI API를 사용하기 위한 환경설정이 완료되었습니다.
29. 마지막으로 아래와 같이 제미나이 AI API를 사용하기 위한 관련 모듈을 설치해 줍니다.


여기까지 되셨으면, 우리는 다음 단계로 넘어갈 수 있는 준비가 되었습니다.
ㅁ 정리
O 우리가 배운 내용
다음 글에서는 텍스트 처리에 사용되는 gemini-pro의 간략한 사용법에 대해 알아보겠습니다.
감사합니다.
좋은 내용의 글들이 계속 올려질 수 있도록 "공감" 버튼을 꾹 눌러주세요.
'파이썬 AI 실습 > Gemini AI & Vertext AI API 사용 하기' 카테고리의 다른 글
| Gemini AI & Vertext AI API 사용 하기 - 5.이미지속 특정 객체의 가격 알아 맞추기 (0) | 2024.01.04 |
|---|---|
| Gemini AI & Vertext AI API 사용 하기 - 4.이미지와 설명을 주고, 특정 이미지를 이와 동일하게 설명하기 (0) | 2024.01.04 |
| Gemini AI & Vertext AI API 사용 하기 - 2.기본 사용법 알아보기 (2) | 2023.12.25 |
| Gemini AI & Vertext AI API 사용 하기 - 0.소개편 (0) | 2023.12.25 |
| Gemini AI & Vertext AI API 사용 하기 - 3.이미지속 텍스트 추출하기 (0) | 2023.12.24 |